Thursday, October 22, 2009
Latest sewing project...
So, my photography business has taken off with leaps and bounds, which is WONDERFUL!!! But it has left me with little time to sew and create new things for the girls. I did manage to finally fit this cute little top in the other night though! I absolutely LOVE the patterns by Whimsy Couture. This lovely little number is from her Peasant Top and Dress pattern, which is super easy to follow and easy to give a bit of your own style to as well. I have a number of her other patterns, including the Easy Capris/Pants, which I have used to make my daughter PJ pants with that she LOVES. Thank you Whimsy Couture!


Thursday, September 17, 2009
Where does the time go??
It seems like just yesterday that she was still in that wobbly-walking stage, and she loved to spin in circles until she fell down in the very middle of the kitchen floor. We would have the radio going full blast, and she would just laugh and bounce and spin until finally she would plop herself down from exhaustion.
Now, let's fast-forward, and I have a beautiful little girl starting her first day of dance class. Where did my little toddler go?? She has grown up so fast, and I have no clue where the time has gone.


Now, let's fast-forward, and I have a beautiful little girl starting her first day of dance class. Where did my little toddler go?? She has grown up so fast, and I have no clue where the time has gone.


Tuesday, September 8, 2009
Made by Rae Jackpack Backpack GUEST GIVEAWAY!!!!
Made by Rae Jackpack Backpack GUEST GIVEAWAY!!!!
You have just got to LOVE these adorable backpacks!! Click on the link above to enter a fantastic giveaway for either the backpack or the pattern. I think I will be buying the pattern whether I win or not, so cute!!
You have just got to LOVE these adorable backpacks!! Click on the link above to enter a fantastic giveaway for either the backpack or the pattern. I think I will be buying the pattern whether I win or not, so cute!!
Monday, June 22, 2009
A new dress!
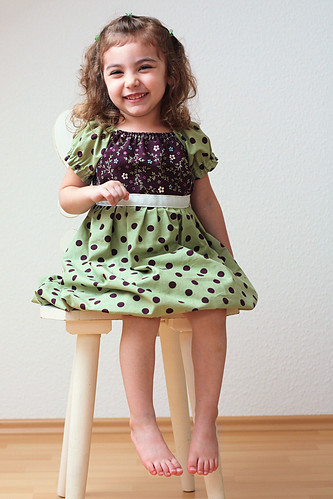
Okay, I know I've been MIA for a few weeks, but I have just been so busy and distracted with all of my new projects that I have going on around here! Not to mention, the two little munchkins that keep me on my toes 24/7. I finally got around to making a new dress for the little diva, and I think it is officially my favorite pattern so far! It turned out so cute, and she kept telling me how pretty it was and that she loved wearing it. Mommy was more than ecstatic to hear those words! If you want an adorable and super quick dress, you have to check out this pattern by The Handmade Dress. This little number only took me about an hour and a half, maybe two, to make, which means I almost finished it during naptime. That's something you can't help but LOVE!



Wednesday, June 10, 2009
Rude and Pathetic!
Due to some VERY rude and uncalled for comments that were received anonymously (which that will now be ending as well, sorry to any family or followers that don't hold google accounts) on a previous post of my baby, I have removed that particular post. It just disgusts me what people will say about children, and I guess I should have know better than to post those photos. There are so many CHILDREN'S photography sites with the same type of pictures that I didn't expect it to be pinpointed like that in such a disgusting manner. I'm so ticked off right now that I'm contemplating removing all of the pictures of my children completely and ending it there. I blame myself for being so stupid as to think that people could see the simple innocence in a BABY picture and not distort it into something altogether different. I will be posting less and only select pictures of my children from this point on, and this includes on my photography blog as well. That was just too much for me to want to hear someone say about my child.
Sunday, May 31, 2009
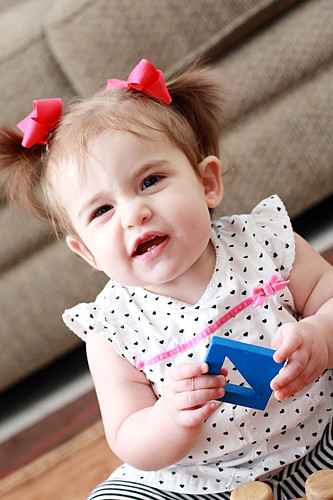
The Scrunchy Face!
Wednesday, May 20, 2009
The Little Boy's Tie in Action!
Thursday, May 14, 2009
My new adventure
So, as some of you already know, I love photography! I finally decided to make a separate blog dedicated to building my skills and portfolio. It took me a little while to decide on a name, but I finally went with "Cherished Keepsakes." It just made me think of all of those great moments that I like to capture of my girls and how much I love them. You can check out my new blog here:


Monday, May 11, 2009
This week's kid's project
Okay, so I've been running a little behind on posting my projects with the little diva, but here's her latest. I didn't actually do the usual weekly craft, but instead just let her go with the finger paints, paper, brush, and a plaster car. She had a grand time painting to her little heart's desire! As you can obviously tell, her fave colors are purple and blue. Shockingly, there was not too much mess to clean up afterwards. Hope you enjoy her masterpiece, and we look forward to her next project!


Saturday, April 25, 2009
My Sweet Little Munky
Friday, April 24, 2009
Robots...
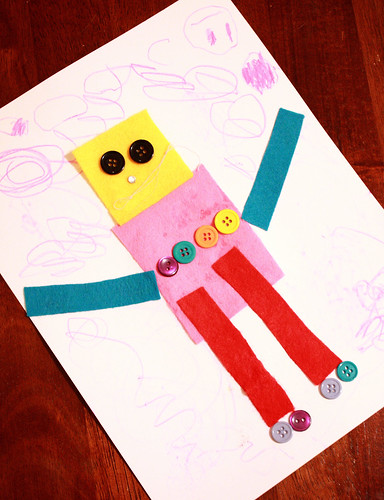
We worked on our Kids Craft Weekly project today, and the Little Diva was super excited about her new robot. She absolutely could not wait to dig into that pile of felt and all of my button stash. After much thought about what colors to use and how many buttons to add to his tummy, she finally settled on her choices. Then, she got down to the business of gluing all of the pieces to the cardstock. I found this to be the most amusing part because she hates to get her hands messy, and you can imagine how much glue was getting all over her fingers while she was trying to chase those felt pieces down. After trying to enlist me to do it for her (but I wouldn't), she finally got over the mess and started to enjoy putting the whole picture together. Next, it was time to decide where to put all of thos pretty buttons that she had spent so much time picking out. By the time we were finished, almost an hour had slipped by, and this little fellow was born!

Tuesday, April 21, 2009
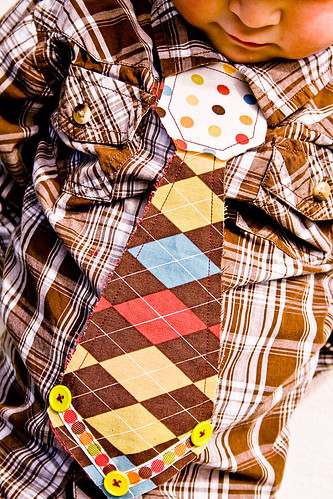
My Version of Little Boy's Tie
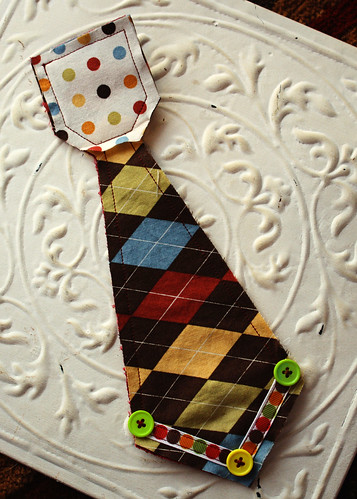
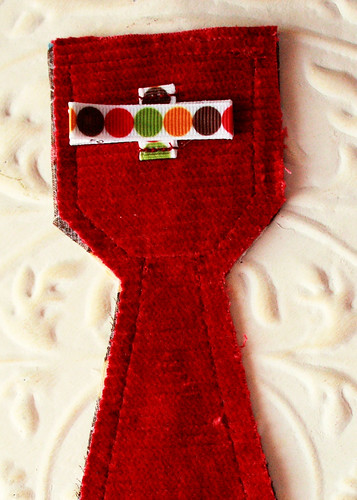
This week I finished my first try at my own idea for a little boy's tie. This particular tie is made with a clip-on back due to responses that I received from other moms stating their preferences. I think it turned out pretty cute, but I would love to know what everyone thinks and if you would like to see a tutorial. It is fairly easy to make and is great for using up scrap fabrics. I used a dark red corduroy for the backing and a ribbon-lined alligator clip for the clip-on. The front has coordinating fabrics and ribbon with button accents. Let me know what you think and if enough people want to see how it's made, I will get to work on a new tutorial. So, keep the feedback comin'!


Friday, April 17, 2009
Crafty Kids
I had a few people during the giveaway who wanted to see crafts for kids, but I am just not good with ideas for crafts that my kiddos can actually do. So, I found this fantastic website and newsletter instead: Kids Craft Weekly. It is absolutely wonderful and a great place for easy yet cute crafts for the kids. The site has great articles and some creative printables for the kids. They also have a monthly giveaway for a free book if you post pictures of your crafty little ones in the photo pool. You receive a weekly newsletter in your email, usually with a really fun theme and a number of new ideas. My plan is to complete one of these projects with the Little Diva each week, and I will post pictures of her completed results here. If you have a blog (or even if you don't), you are welcome to follow along with your kids and post pics on your blog as well. Just leave a comment on that week's post, and we would love to come check them out. So, get out that construction paper, the messy glitter, and those glue sticks and have a blast!
Wednesday, April 15, 2009
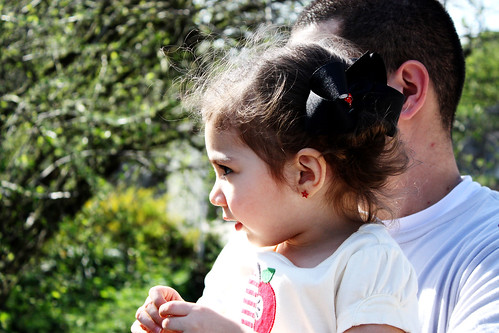
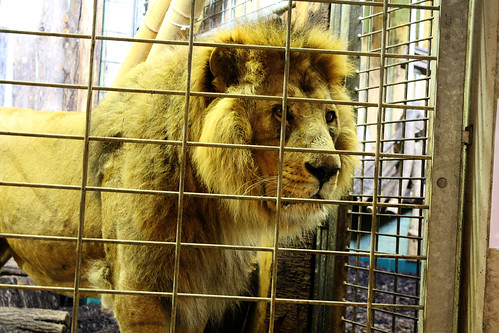
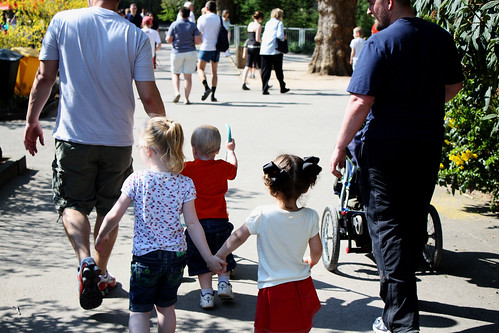
Hundredth Zoo Trip, First German Zoo
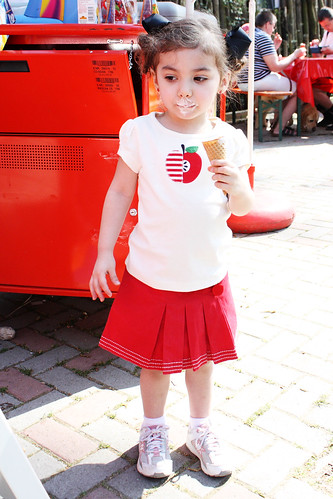
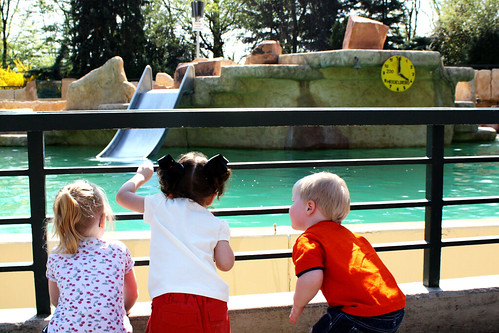
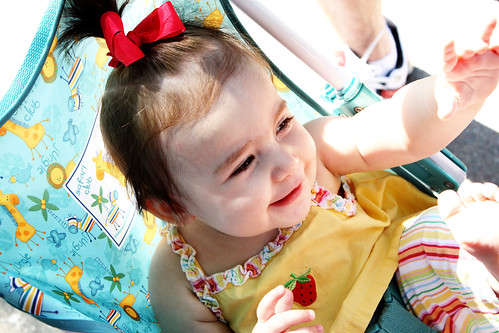
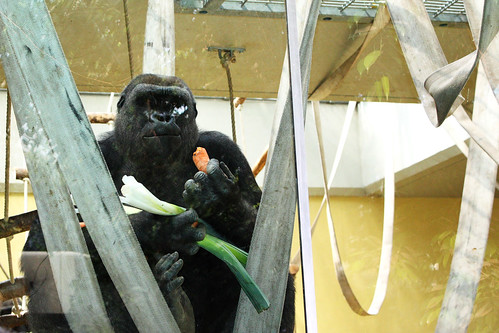
The weather was so wonderful last weekend that I just had to go explore something or somewhere, and we had promised the Little Diva that we would take her to the zoo soon. So, we made our first trip to a German zoo at the Tiergarten Heidelberg (translation: Heidelberg Zoo). We had a great time, including having a lion close enough that a very brave/stupid person could have practically touched him/gotten their hand bitten off. We went with some friends that were in town which was great, and the kids had a fantastic time. I have to say that they let you get MUCH closer to the animals here than they would ever consider in stateside zoos, which is amazing and scary at the same time. Heidelberg’s zoo is a rather small zoo, so I wonder how things will be at the next zoo we visit… and I’m sure there will be a next, and a next, and a next….



Monday, April 6, 2009
Clip,Band, or Just Like Daddy?
Okay, I have some ideas for a little boy's tie tutorial, but I wanted a little input first. I am trying to decide whether to make this tie with a clip, an elastic band to go under the collar around the neck, or a full-size tie just like Daddy's. What would you guys like to see??
First true shots in manual...
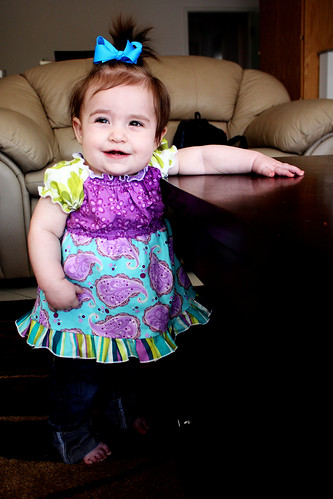
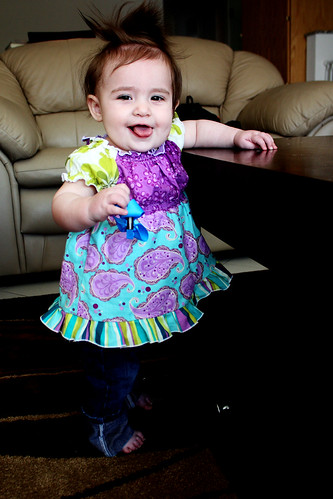
As time will show, one of my many other obsessions is photography. I take so many pictures of my kids that my 3 year old now runs when she sees me coming with a camera. I was lucky enough to get an amazing Canon Rebel XSi DSLR for an early Christmas gift, and I have been on a mission ever since. I wanted to make sure that I used the camera to its full worth. I figured if I was just going to keep pointing and shooting in auto that I might as well have not wasted the money and just kept my old one. So, I have been reading and studying how to use all of my manual settings to their full capacity. I just had to share these shots that I took a couple of days ago; first, because they are just too darn cute, and second, they are my first TRUE manual indoor shots. I did not use a flash with these photos or any auto settings. I set my aperture, shutter speed, ISO, and metered my own lighting for these. Needless to say, I was very proud of how they turned out for being my first time to try it on my own. One step further away from amateur photography… Watch out world!


Friday, April 3, 2009
And the winner is.....
Commenter #13:
Random numbers generated Apr 3 2009 at 19:12:10 by http://www.psychicscience.org/.
Congratulations Sherry and Gena! Please email me at: htewkes@hotmail.com to claim your prize :o)
A big thank you to all of the lovely people who answered my questions! You have been a great help, and I hope to be able to add many of the items that were mentioned. I have so many ideas for boy patterns running through my head, and hopefully I can get them organized and actually produce some great things over the next few months!
I will be having another giveaway once I reach 50 followers, so keep checking back! It will be a good one... :o)
Tuesday, March 31, 2009
SO EXCITED!!
Keep the ideas coming girls!! You have my creative little brain flowin'! I have already drawn up a couple of ideas for boy's outfits, and I have some other ideas that I am thinking about. I can't wait to start developing the actual patterns for everything! I also have a few ideas for some tutorials as well after seeing everyone's posts. Plus, I also have some great places to find excellent tutorials as well :o) I will be posting like crazy over the next few weeks I'm sure hehe. So thank you everyone for all your wonderful ideas, and I can't wait to see more! Looking forward to the giveaway in a few days :o)
Saturday, March 28, 2009
Let the free giveaway begin!
Now that I have reached 25 followers, let the free giveaway begin! First, I will start with the prize description for this first giveaway. This prize will consist of your choice of 6 of the clippies in the picture below and along with these I will be including a coordinating (not necessarily matching but coordinating colors) 3 inch boutique style bow for each clippie. All of my bows and clippies also include a no-slip grip which works wonderfully for that fine baby hair. That means you will be receiving 6 clippies and 6 bows!! That will gave a great selection for any little princess to wear :o)

Now, let me explain how to participate. I am in the process of working on a few of my own original patterns and have a few ideas, but I would love to know what others would actually like to see. There are many children's clothing patterns out there that are availabe already, but I would like to know if there is anything that you just haven't been able to find or even if there is just a type of tutorial that you would like to see. Leave a comment on this post letting me know what patterns you would like to see or what tutorials you think might be useful, and you will be entered into the giveaway! On Friday April 3rd at 12:00pm EST, I will post the winner which will be chosen at random using a random number generator!
Now, let me explain how to participate. I am in the process of working on a few of my own original patterns and have a few ideas, but I would love to know what others would actually like to see. There are many children's clothing patterns out there that are availabe already, but I would like to know if there is anything that you just haven't been able to find or even if there is just a type of tutorial that you would like to see. Leave a comment on this post letting me know what patterns you would like to see or what tutorials you think might be useful, and you will be entered into the giveaway! On Friday April 3rd at 12:00pm EST, I will post the winner which will be chosen at random using a random number generator!
Thursday, March 26, 2009
Finally Finished!
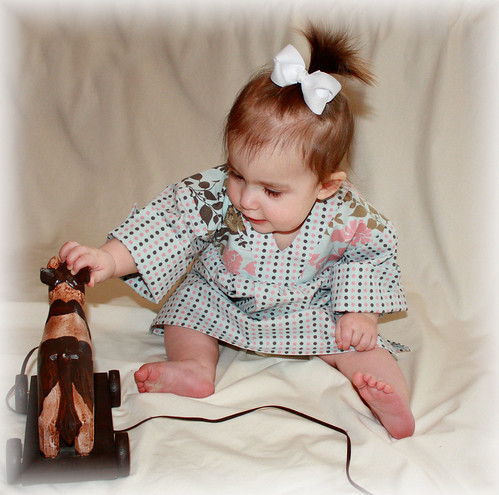
SO, I know I have been talking about this dress for like a month, but I finally finished it. With the move and the kids, life got a little hectic there for a minute, but now we're back on track. I think this kimono-style dress turned out really cute, just a tad big for the little munky, but I'm sure she will grow into it quickly. I love the "comfy" look and feel of the dress itself, and I have to say that the pattern was very simple and easy to follow. It took me just a couple of hours to make once I actually got started. The only thing that I didn't add was the tie that is supposed to be on the front waist because she would inevitably just sit and chew on it until it was an icky little mess. Otherwise, I followed the pattern for the 9-12 months, and it fit her just about perfectly (shockingly enough, since she's wearing 12-18 months in most things now LOL). This is one of the many different patterns included in Amy Butler's "little stitches for little ones" book. I highly recommend it to anyone with little ones or in need of a gift for a new mommy. So many ideas and all of which are very easy to follow and understand. Be sure to check it out!



Monday, March 16, 2009
The Rainbow of Clippies
I have been working on clippies and hairbows for my girls and some other family members over the past few days (in between the unpacking of endless boxes). It is my way of relaxing, and it's a chance to think of something other than where I'm going to put my zillion framed pictures without using the unpenetrable cement walls.
Also, some of these clips and some of the hairbows in an upcoming post will be part of the first giveaway prize. I only need 7 more followers to reach 25, so come on girls!! It will be a great prize package, so grab your friends and have them come follow me too!
Tuesday, March 10, 2009
I'm Back!
I finally have internet again! I was on the verge of going crazy without it due to my obsessive need to check my email 20 times a day. I did figure out that my days are much more productive when I don't have the computer around though. We are mostly unpacked except for the pile of boxes still left in the basement which I just can't bring myself to tackle right now, maybe this weekend. I am going to finally finish that dress for my little Chunky Munky this week, and I will be posting pics later on. It should turn out super cute, and I love the fabric that I chose for this one. The projects will start flowing more now that I am getting organized and have a little more space and time on my hands. Spring and summer are just around the corner, and I have so many ideas for clothing and patterns that I can barely keep them all straight!
Saturday, February 28, 2009
The New House
Just wanted to post a slideshow of our new house! Finally, we get to move in! We have a few more rooms in the basement that I didn't include in the pics, but if you've seen one room with tile floors and cement walls, you have seen them all. I am so excited to actually have some space to move around after being stuck in this little 2-bdrm apartment for the past month and a half!
Wednesday, February 25, 2009
A little late, I know!
SO, I have had quite the busy week! We are getting ready to move into our new house on Monday, and I am so excited!! I just lost track of time, and then we lost internet connection for almost 2 full days. You know that I almost panicked and went through withdrawals. Now, after giving you all my excuses for why I didn't get to post any of the possible giveaway prizes, here are just a few for you to take a little peak at. There will be more to come when I get a free minute to take some extra pictures. I am only 9 people away from having 25 followers, so keep an eye out for the first giveaway posting....
made by yours truly
made by Busy Hands Boutique
 Sanity Saver a.k.a Crayon Caddy
made by me as well
Tuesday, February 17, 2009
Tell everyone!!
So, I have decided to start something new. Something that I think everyone will really enjoy! In an effort to get more followers, I have decided to start having some fantastic giveaways. Prizes could possibly include hair accessories, clothing items, patterns, and many other items. All items will be handmade in nature by me or fellow crafters.
The first giveaway will be when I have reached 25 followers, and then there will be another giveaway for every 25 more followers. Once I have reached the first 25, I will post a blog with the featured prize. If you would like to enter the giveaway, you will have to comment on at least one post within my blog. Then, the winner will be chosen randomly at the end of 1 week!
I will post pictures of some possible prizes tomorrow, so keep your eyes open for the latest updates :o)
Saturday, February 14, 2009
Shirring 101
I had a couple of people ask me about tips on shirring after I posted the peasant tops that I made for the girls. So, I decided to make a short tutorial on how I shirred all of the areas of these shirts. Originally, I tried to use the method that the pattern suggested, but it just wasn’t quite turning out the way that I wanted. So, I played with it until I found what I liked, which is in the tutorial below.
1. You will need elastic thread for your bobbin only. Your top thread will be whatever you choose for your topstitch to be. You will also want to make sure that you hand-wind the thread (this I did find out from the pattern). You will want to wind your elastic firmly around the bobbin, pulling just slightly to give it some tightness. Then, insert the bobbin, and you are ready for the next step.
2. Next, you will want to make sure that you are doing your shirring on the right (top) side of the fabric, so that your elastic is on the back side of the fabric. Always make sure to start with the needle in the fabric that way you know exactly where it will start the row. Now, the position of your first row is your preference. For this example, I chose to make it about a half an inch from the topstitch of the hem. In the previous posted project, I started the first row about a quarter of an inch from the edge of the rolled hem.

3. Hold on to the elastic thread when you first start to sew (just so the elastic doesn’t shrink back into the bobbin). Then, do a quick backstitch to lock everything into place and start stitching around the edge back to where you began. Now, backstitch again, and then leave a little extra elastic before cutting because you will now tie both the beginning elastic and the ending elastic together in a couple of knots to make sure the elastic has a secure hold.

4. Now, you will move over and line up your first stitch line with the right edge of the presser foot, and follow the same process as in Step 3. One thing that you will need to do each time from this point on is make sure the fabric is flat as you are feeding it through the presser foot.


5. You can continue this process for as many lines as you would like shirred, depending on the project you are working on.


6. The last thing that I do (which I did learn this step from the pattern as well) is to use your iron on the steam setting and just shoot some steam onto the area that was shirred. This will gather the shirred area even more and give it a fantastic look and feel.

1. You will need elastic thread for your bobbin only. Your top thread will be whatever you choose for your topstitch to be. You will also want to make sure that you hand-wind the thread (this I did find out from the pattern). You will want to wind your elastic firmly around the bobbin, pulling just slightly to give it some tightness. Then, insert the bobbin, and you are ready for the next step.
2. Next, you will want to make sure that you are doing your shirring on the right (top) side of the fabric, so that your elastic is on the back side of the fabric. Always make sure to start with the needle in the fabric that way you know exactly where it will start the row. Now, the position of your first row is your preference. For this example, I chose to make it about a half an inch from the topstitch of the hem. In the previous posted project, I started the first row about a quarter of an inch from the edge of the rolled hem.
3. Hold on to the elastic thread when you first start to sew (just so the elastic doesn’t shrink back into the bobbin). Then, do a quick backstitch to lock everything into place and start stitching around the edge back to where you began. Now, backstitch again, and then leave a little extra elastic before cutting because you will now tie both the beginning elastic and the ending elastic together in a couple of knots to make sure the elastic has a secure hold.
4. Now, you will move over and line up your first stitch line with the right edge of the presser foot, and follow the same process as in Step 3. One thing that you will need to do each time from this point on is make sure the fabric is flat as you are feeding it through the presser foot.
5. You can continue this process for as many lines as you would like shirred, depending on the project you are working on.
6. The last thing that I do (which I did learn this step from the pattern as well) is to use your iron on the steam setting and just shoot some steam onto the area that was shirred. This will gather the shirred area even more and give it a fantastic look and feel.
And VOILA!! You're finished and should have a perfectly shirred garment. If you have any questions, feel free to comment or email me!
Wednesday, February 11, 2009
Picture Perfect
So, here they are, as promised, just not in the same picture. It is nearly impossible to get them to actually sit together and crack a smile at the same time. One is usually pulling hair, while the other one is complaining about having to help hold her sister up. The outfits did turn out wonderful though, and they were each happy to give mommy one of their big beautiful grins (as long as they didn't have to share the spotlight).


Friday, February 6, 2009
I LOVE my serger!
I am in love with my new serger! I have been sewing like crazy since I opened the box, and I can't wait to make more outfits for the girls. This is my most recent project, which is the "Claire" peasant top from Sandi Henderson's Portabello Pixie patterns. Also, I used fabric from her gorgeous Farmer's Market line. Of course, I made them coordinate, so that the girls would match! I love the fact that they have such a finished look on the inside, and my favorite feature is the ability to do a rolled hem. This is one thing that I absolutely adore. It looks so much more professional than a plain, folded topstitch hem, especially on shirts like these. Considering this was one of my first serging projects, I think it turned out pretty nice. Although, I did have to do some slight alterations to the necklines because they were slightly large for both my girls. It doesn't seem to be too noticeable though. I will post a picture of them both wearing their new clothes as soon as I can get them both in the same place sitting still at the same time!!

Friday, January 30, 2009
Gotta Love This!
Okay, so I fed my 6 month old her first real finger food (that wasn't a Cheerio) today. I started with tofu because it's nice and squishy and easy to chew. Big sister loved it when she was little, so I thought I would give it another try this time around too. And let me tell you! She thought that was the best thing outside of stealing and chewing on her sister's Barbies HAHA. Here are a few absolutely adorable pictures of her having a grand time squishing and shoving and smiling away!

Hmm... SQUISH!!!
Monday, January 26, 2009
Getting settled, FINALLY!
So, we have arrived! We have been in Germany for a week now, but what a completely hectic week for all of us. First of all, a 12 hour day spent flying and running all over airports with 2 kids under the age of 3 = CRAZINESS. But, they handled it very well, and we made it through the day. Upon arrival, 7:00am Germany time (while it was really midnight, at least for us), we headed to Heidelberg from Frankfurt airport (about 45 minute drive). After settling in our apartment, we all took a nice long nap which then caused us all to be up at 2:00am HAHA.
After a couple of days of recovery from jet lag, the next whirlwind of h*ll began. The girls and I all were hanging our heads over the toilet with a just lovely stomach virus that thankfully only lasted about 48 hours except for the little one, who is still having trouble keeping "everything" inside her diaper and not all over mommy's leg, YUCK.
OKAY, now that the first week is over and we are all much healthier and happier, let's hope this week goes better! We took a walk around our local area this morning and took a few pictures. Plus, I took a few pictures of our temporary apartment (going to look at houses tomorrow, YAY!). There are really some beautiful areas here, and I will add pictures as we go out and do more but at the moment we have only been around the base to the commissary, px, etc... not exactly breathtaking views hehe.
Subscribe to:
Comments (Atom)

